The Orbit Water Timer is a digital irrigation device designed for efficient lawn and garden watering. It offers automatic and manual modes, multiple start times, and customizable duration settings for optimal water management. Durable and easy to use, it ensures precise control over your watering schedule, promoting healthy plant growth while conserving water;
Overview of the Orbit Water Timer
The Orbit Water Timer is a versatile and user-friendly irrigation controller designed to streamline lawn and garden watering. It offers both automatic and manual operation modes, catering to different watering needs. With features like multiple start times, customizable watering durations, and adjustable frequencies, it provides flexibility for various landscapes. The timer is compatible with smart systems, allowing integration with home automation devices for remote control. Its durable design ensures long-lasting performance, while the intuitive interface makes programming straightforward. Whether for small gardens or larger yards, the Orbit Water Timer is a practical solution for efficient water management and healthy plant growth. It also supports manual watering for quick, one-time adjustments without altering scheduled programs.
Key Features and Benefits
The Orbit Water Timer boasts an array of features that make it an ideal choice for efficient watering. It offers multiple start times, allowing up to three different watering sessions per day. The customizable duration settings enable precise control over water usage, while the adjustable frequency feature lets you water as often as every day or as infrequently as once a week. Its compatibility with smart home devices enhances convenience, enabling remote management through a smartphone app. The timer also includes manual watering functionality, allowing quick adjustments without disrupting programmed schedules. Additionally, the device is designed with durability in mind, ensuring reliable performance season after season. These features collectively promote water conservation and healthy plant growth, making it a practical and eco-friendly solution for any garden or lawn.

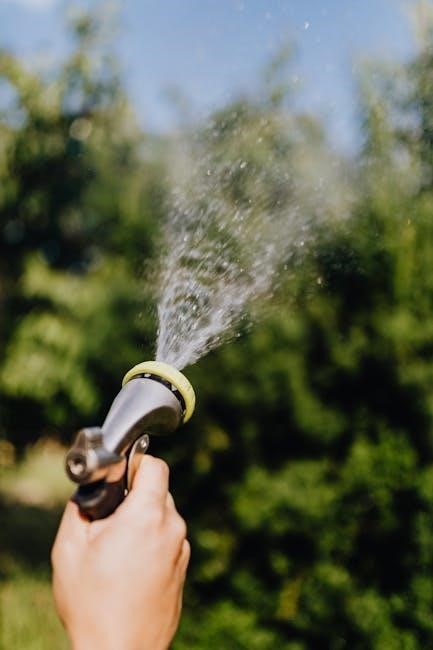
Setting Up the Orbit Water Timer Manually
Step-by-Step Guide to Manual Mode
Turn the dial to the MANUAL position. Use the “+” or “-” buttons to set the desired watering duration (1-240 minutes). Press START to begin watering. After completion, the timer automatically returns to its programmed schedule, ensuring uninterrupted operation.
Start by turning the dial to the MANUAL position. This mode allows you to water without altering your programmed schedule.
Use the “+” or “-” buttons to select the desired watering duration, ranging from 1 to 240 minutes.
Press the START button to initiate manual watering. The timer will display the remaining time and automatically revert to its programmed schedule after completion.
To stop manual watering early, turn the dial to the OFF position and then back to AUTO or MANUAL.
The LED indicator will flash, showing the remaining time. Once done, the timer resumes its automatic programming.
For troubleshooting, ensure the battery is strong and connections are secure. If issues persist, refer to the error codes in the manual.
This method provides flexibility for one-time watering needs while maintaining your regular schedule.

Programming the Orbit Water Timer
Programming the Orbit Water Timer allows you to customize watering schedules with ease. Set multiple start times (A, B, C), adjust durations, and choose watering frequency. Use the dial and buttons to configure these settings effortlessly. This feature ensures efficient water usage and tailored irrigation for your lawn and garden.
How to Set Watering Start Times
To set watering start times on the Orbit Water Timer, begin by selecting the desired mode using the dial. Choose between Auto, Manual, or Off, depending on your preference. Once in the correct mode, press the appropriate button to access the start time settings. Use the plus and minus buttons to adjust the time, ensuring you select the correct AM or PM format. Assign different start times to the A, B, and C settings for multiple watering sessions throughout the day. After setting your desired times, save the settings to ensure they are applied. If needed, use the Clear button to reset or correct any errors. Always verify your settings to confirm the correct watering schedule is programmed.
Adjusting Watering Duration
Adjusting the watering duration on the Orbit Water Timer allows you to customize how long each station waters. To do this, select the station you wish to modify using the dial or navigation buttons. Once the station is selected, use the plus (+) and minus (-) buttons to increase or decrease the watering time, which can range from 1 to 240 minutes. Press the “MANUAL/CLEAR” button to confirm and save your changes. This feature ensures you can tailor watering times to meet the specific needs of your plants, preventing overwatering or underwatering. The timer’s interface makes it easy to fine-tune durations for optimal water usage and plant health.
Setting Watering Frequency
Setting the watering frequency on the Orbit Water Timer allows you to determine how often your system waters. Using the dial or navigation buttons, select the desired frequency, such as every day, every other day, or every third day. Some models also offer interval watering, enabling you to set watering cycles at specific intervals (e.g., every 2 or 3 days). After selecting your preference, press the “MANUAL/CLEAR” button to save the setting. This feature ensures consistent hydration for your lawn and plants while reducing overwatering. The timer’s frequency options provide flexibility to adapt to changing weather conditions and seasonal needs, promoting water conservation and healthier plant growth.
Troubleshooting Common Issues
Common issues with the Orbit Water Timer include faulty sensors, incorrect programming, or battery drain. Check connections, reset settings, and ensure proper installation. Refer to the manual for error codes and solutions to resolve problems efficiently, ensuring optimal performance and water management.
Identifying and Resolving Common Problems
Common issues with the Orbit Water Timer include the timer not turning off in manual mode, incorrect start times, or the display not showing the correct time. To resolve these, ensure the timer is properly programmed and batteries are fresh. If the timer fails to activate, check valve connections and ensure the dial is set to AUTO. For display issues, reset the timer by turning it off and on. If problems persist, refer to the error codes in the manual for specific solutions. Regularly cleaning the timer and ensuring proper installation can prevent many issues, ensuring reliable and efficient watering performance.
Understanding Error Codes and Solutions
The Orbit Water Timer displays error codes to help diagnose issues. Common codes include E1 (low battery), E2 (sensor malfunction), and E3 (programming errors). For E1, replace the batteries and restart the timer. If E2 appears, check the sensor connections and ensure they are clean and secure. E3 indicates a programming conflict, so reset the timer and reprogram the settings. For persistent issues, refer to the user manual for detailed troubleshooting steps. Regular maintenance, such as cleaning the timer and updating schedules, can help prevent errors. Always ensure the timer is properly synchronized with your watering system for optimal performance.

Maintenance and Care
Regularly clean the Orbit Water Timer to prevent debris buildup. Replace batteries annually or when low battery indicators appear. Protect the timer from extreme weather conditions to ensure longevity and reliable performance.
Cleaning the Timer
Regular cleaning is essential to maintain the Orbit Water Timer’s performance. Use a soft, dry cloth to wipe the exterior, removing dirt or debris. For tougher stains, dampen the cloth lightly with water, but avoid harsh chemicals or abrasive materials. Gently clean the display screen with a microfiber cloth to ensure visibility. Check the timer’s valves and connections for mineral buildup or dirt, which can affect water flow. Use a small, soft-bristled brush to clean out any debris from the valve openings. Avoid submerging the timer in water, as it may damage the internal electronics. By keeping the timer clean, you ensure accurate watering schedules and extend its lifespan.

Replacing Batteries
To ensure continuous operation, replace the Orbit Water Timer batteries when the low-battery indicator appears. Use high-quality, alkaline batteries of the correct type (typically AA or AAA). Open the battery compartment by sliding or unscrewing it, depending on your model. Remove the old batteries and insert the new ones, ensuring the polarity matches the diagram inside the compartment; Avoid mixing old and new batteries to maintain optimal performance. After replacing, close the compartment securely and test the timer to confirm it functions properly. Regular battery replacement prevents programming loss and ensures reliable watering schedules. Always refer to your specific model’s manual for detailed instructions.

Integration with Smart Systems
The Orbit Water Timer integrates seamlessly with smart home devices, offering remote control and scheduling through Wi-Fi connectivity. Compatible with popular smart systems, it enhances convenience and efficiency for modern irrigation management.
Compatibility with Smart Home Devices
The Orbit Water Timer is designed to integrate seamlessly with popular smart home systems, including Amazon Alexa and Google Home. This compatibility allows users to control their irrigation schedules remotely through voice commands or smartphone apps. The timer also works with the B-hyve app, enabling precise water management and real-time adjustments. By connecting to Wi-Fi, the Orbit Water Timer enhances convenience and efficiency, ensuring your lawn and garden receive the right amount of water without manual intervention; This smart integration makes it easy to adapt watering schedules based on weather conditions and seasonal changes, offering a modern solution for lawn care.
Setting Up Smart System Integration
To integrate the Orbit Water Timer with smart systems, start by downloading and installing the B-hyve app on your smartphone. Create an account or log in if you already have one. Ensure your timer is connected to a Wi-Fi network by pressing and holding the reset button until the Wi-Fi icon appears. Open the app, select “Add Device,” and follow the prompts to sync your timer. Once connected, you can program and monitor watering schedules remotely. For voice control, enable the Orbit skill in Amazon Alexa or Google Home and link your account. If issues arise, reset the timer by pressing and holding the reset button for 10 seconds. This ensures seamless smart system integration for enhanced convenience and efficiency.
The Orbit Water Timer offers efficient, versatile, and user-friendly water management solutions. Its automatic and manual modes ensure optimal watering schedules, promoting healthy plant growth while conserving water effectively.
Final Tips for Optimal Use
To maximize the efficiency of your Orbit Water Timer, ensure regular cleaning to prevent dust buildup and maintain precise control. Replace batteries promptly to avoid losing programmed settings. Utilize the manual mode for quick, one-time adjustments without altering your schedule. For smart models, integrate with home systems for remote control and enhanced customization. Adjust watering durations seasonally to match plant needs and conserve water. Always refer to the user manual for troubleshooting common issues, and take advantage of Orbit’s customer support for personalized assistance. By following these tips, you can ensure your Orbit Water Timer operates seamlessly, providing consistent and efficient watering for a thriving lawn and garden.