The Honeywell T6 Wi-Fi Thermostat is a smart home device from the Lyric T6 Pro series, offering Wi-Fi connectivity and seamless integration with the Honeywell Home app for remote temperature control and scheduling, designed for convenient temperature management and energy savings.
Overview of the Honeywell T6 Wi-Fi Thermostat
The Honeywell T6 Wi-Fi Thermostat, part of the Lyric T6 Pro series, is a smart, programmable thermostat designed for compatibility with various HVAC systems. It offers remote control via the Honeywell Home app, enabling users to manage temperature settings, create schedules, and integrate with smart home systems. The thermostat features a user-friendly interface, geofencing capabilities, and energy-saving modes. Its installation involves the UWP mounting system and adapters for a secure and efficient setup, ensuring compatibility with most home heating and cooling systems.
Key Features and Benefits
The Honeywell T6 Wi-Fi Thermostat offers advanced features like geofencing, smart home integration, and energy-saving modes. It provides remote access through the Honeywell Home app, enabling users to adjust settings and monitor energy usage. The thermostat supports various HVAC systems and includes a decorative cover plate for a sleek appearance. Its programmable scheduling and Wi-Fi connectivity ensure convenience and efficiency, making it a versatile solution for modern home climate control and energy management.

System Requirements and Compatibility
The Honeywell T6 Wi-Fi Thermostat requires a compatible HVAC system and a stable Wi-Fi network for optimal performance and smart home integration features to function effectively.
Checking Compatibility with Your HVAC System
Ensure your HVAC system is compatible with the Honeywell T6 Wi-Fi Thermostat by verifying its voltage requirements and checking for necessary wiring configurations. The thermostat supports most standard systems, but certain older models or unique setups may require additional adapters. Refer to the installation manual or consult a professional to confirm compatibility before proceeding with installation to avoid potential issues or damage to your system.
Wi-Fi Network Requirements
Your Honeywell T6 Wi-Fi Thermostat requires a stable 2.4 GHz Wi-Fi network connection to function properly. Ensure your router is within range and supports the required frequency band. A strong signal is essential for reliable operation. Verify your network name (SSID) and password are correct before connecting the thermostat. Avoid using guest networks or VPNs, as they may interfere with connectivity. Ensure your router is updated with the latest firmware for optimal performance.

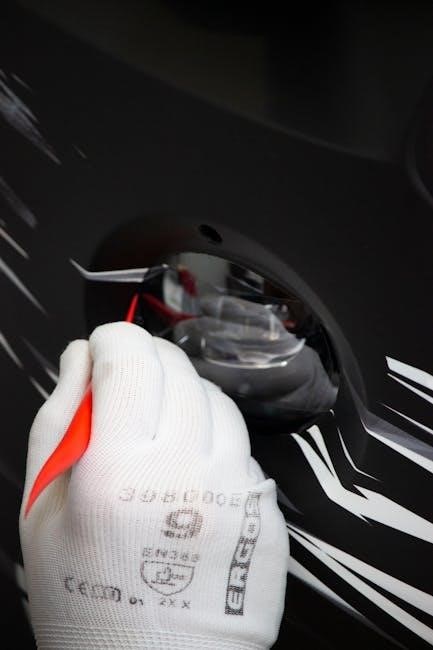
Physical Installation of the Honeywell T6 Thermostat
Mount the Honeywell T6 thermostat using the UWP mounting system, ensuring it is level and securely fastened to the wall with provided screws. Avoid over-tightening to prevent damage. Connect the appropriate wires (R, W, Y, G, C) to their respective terminals, referring to the wiring diagram for accuracy. Use the J-box adapter if necessary for proper fit and wiring compatibility. Ensure all connections are snug and properly secured for reliable operation.
Tools and Materials Needed
To install the Honeywell T6 Wi-Fi Thermostat, you will need the UWP mounting system, screws, wall anchors, and a J-box adapter for secure installation. Additionally, a decorative cover plate is provided for a polished look. Ensure you have a screwdriver (preferably Phillips-head) for tightening screws and a level to ensure proper alignment. A drill may be necessary for creating holes, and a voltage tester is recommended to verify power is off before starting. Needle-nose pliers can assist with wiring, and a pencil and tape measure are handy for marking the wall.
Mounting the Thermostat on the Wall
Mount the Honeywell T6 thermostat using the UWP mounting system. Place the UWP over the wall anchors and insert the provided screws. Tighten them gently without over-tightening. Ensure the UWP is level and securely fastened to the wall. For a clean look, attach the decorative cover plate around the thermostat after installation is complete. Follow the manual’s guidelines to avoid damaging the device or the wall. Proper alignment is essential for optimal functionality and aesthetics.
Wiring the Thermostat
Connect the Honeywell T6 thermostat to your HVAC system by matching the wires to the appropriate terminals. Ensure the power is off before starting. Use the provided wiring labels or consult your system’s manual for compatibility. Securely attach the wires to the thermostat’s terminals, avoiding loose connections. Double-check all connections to prevent malfunctions. If unsure, consult a professional for assistance. Proper wiring is crucial for safe and efficient operation of the thermostat.

Setting Up the Honeywell Home App
The Honeywell Home app allows you to control your T6 thermostat remotely. Download it, create an account, and follow in-app instructions to set up your device.
Downloading and Installing the Honeywell Home App
To control your Honeywell T6 Wi-Fi Thermostat, download the Honeywell Home app from the App Store (iOS) or Google Play Store (Android). Search for “Honeywell Home,” select the app, and follow the on-screen instructions to install it. Ensure your device is compatible with the app’s system requirements. Once installed, open the app to begin the setup process for your thermostat. This step is essential for remote access and smart features.
Creating an Account and Logging In
After installing the Honeywell Home app, launch it and select “Create Account” to register. Enter your email address, create a strong password, and provide basic information. Verify your email by clicking the link sent by Honeywell. Once verified, log in using your credentials to access the app’s features. This step is necessary to connect your T6 thermostat to your account and enable remote control and smart home integration.

Connecting the Thermostat to Wi-Fi
To connect your Honeywell T6 thermostat to Wi-Fi, open the Honeywell Home app, navigate to the Wi-Fi settings, select your network, enter your password, and follow the in-app prompts to complete the connection.
Configuring Wi-Fi Settings on the Thermostat
Access the thermostat’s menu, navigate to the Wi-Fi settings, and select your network from the available options. Enter your network password using the touchscreen interface. Ensure the thermostat is in Wi-Fi setup mode and follow the on-screen instructions to complete the connection. Once connected, a confirmation message will appear. Use the Honeywell Home app to verify the connection status and ensure the thermostat is linked to your account for remote control and scheduling.
Linking the Thermostat to Your Honeywell Home Account
Open the Honeywell Home app, log in to your account, and navigate to the “Add Device” section. Select the thermostat option and follow the prompts to link it to your account. Ensure the thermostat is already connected to your Wi-Fi network. Once linked, you’ll receive confirmation, and the thermostat will be accessible via the app for remote temperature control, scheduling, and smart home integration features.

Advanced Features and Customization
The Honeywell T6 Wi-Fi Thermostat offers advanced features like programmable scheduling, geofencing, and smart home integration, enabling personalized temperature control and energy efficiency through the Honeywell Home app.
Scheduling and Programmable Settings
The Honeywell T6 Wi-Fi Thermostat allows users to create custom schedules and programmable settings through the Honeywell Home app. Homeowners can set temperature preferences for different times of the day, optimizing comfort and energy usage. The thermostat supports multiple schedules, making it easy to adjust settings based on daily routines or seasonal changes. Additionally, the app provides flexibility to modify schedules remotely, ensuring optimal temperature control even when not at home.
Geofencing and Smart Home Integration
The Honeywell T6 Wi-Fi Thermostat supports geofencing technology, automatically adjusting temperature settings based on your location. Through the Honeywell Home app, the thermostat can detect when you leave or arrive home, optimizing energy usage and comfort. It also integrates seamlessly with smart home systems like Apple HomeKit, allowing voice control via Siri and compatibility with other smart devices for a unified home automation experience.
Troubleshooting Common Issues
Common issues include Wi-Fi connectivity problems, incorrect thermostat configuration, and installation errors. Refer to the manual or Honeywell support for detailed solutions and guidance.
Resolving Wi-Fi Connectivity Problems
Wi-Fi issues with the Honeywell T6 Thermostat often arise from incorrect network configuration or app setup. Ensure your thermostat is connected to a 2.4 GHz network, as 5 GHz is not supported. Restart both the thermostat and router, and verify the Wi-Fi password. If problems persist, reset the thermostat to factory settings via the Honeywell Home app or by holding the thermostat’s reset button. Consult the manual for detailed troubleshooting steps.
Addressing Installation or Configuration Errors
Common installation errors include incorrect wiring or improper mounting. Ensure the UWP mounting system is securely fastened without over-tightening. Verify all wires match the HVAC system’s configuration. If the thermostat fails to power on, check the circuit breaker or fuse. Configuration issues may arise from app setup; restart the thermostat and router, then retry pairing. Refer to the manual for wiring diagrams and troubleshooting steps. If problems persist, perform a factory reset via the app or by holding the reset button.

Maintenance and Updates
Regularly update the Honeywell T6 thermostat software via the Honeywell Home app to ensure optimal performance. Perform a factory reset if issues arise, and check the Honeywell website for the latest firmware versions to keep your device up-to-date and functioning smoothly.
Regular Maintenance Tips
Regular maintenance ensures your Honeywell T6 Wi-Fi Thermostat operates smoothly. Clean the device with a soft cloth to prevent dust buildup. Check for software updates via the Honeywell Home app and install them promptly. Verify Wi-Fi connectivity regularly to maintain remote functionality. For battery-powered models, monitor battery levels and replace them as needed. Additionally, review and update your scheduling preferences to optimize energy usage and ensure your system runs efficiently year-round.
Updating Thermostat Software
Updating your Honeywell T6 Wi-Fi Thermostat’s software is crucial for optimal performance. Use the Honeywell Home app to check for updates and follow on-screen instructions to download and install the latest version. Ensure a stable Wi-Fi connection during the update to prevent interruptions. The thermostat will restart automatically after installation. Regular updates enhance features, improve security, and fix any bugs, ensuring your thermostat remains up-to-date and functions seamlessly with your smart home system.